Starting to Learn Kubernetes a Step Behind - 03. Raspberry Pi -
Story
- Starting to Learn Kubernetes a Step Behind - 01. Environment Selection -
- Starting to Learn Kubernetes a Step Behind - 02. Docker For Mac -
- Starting to Learn Kubernetes a Step Behind - 03. Raspberry Pi -
- Starting to Learn Kubernetes a Step Behind - 04. kubectl -
- Starting to Learn Kubernetes a Step Behind - 05. workloads Part 1 -
- Starting to Learn Kubernetes a Step Behind - 06. workloads Part 2 -
- Starting to Learn Kubernetes a Step Behind - 07. workloads Part 3 -
- Starting to Learn Kubernetes a Step Behind - 08. discovery&LB Part 1 -
- Starting to Learn Kubernetes a Step Behind - 09. discovery&LB Part 2 -
- Starting to Learn Kubernetes a Step Behind - 10. config&storage Part 1 -
- Starting to Learn Kubernetes a Step Behind - 11. config&storage Part 2 -
- Starting to Learn Kubernetes a Step Behind - 12. Resource Limitations -
- Starting to Learn Kubernetes a Step Behind - 13. Health Checks and Container Lifecycle -
- Starting to Learn Kubernetes a Step Behind - 14. Scheduling -
- Starting to Learn Kubernetes a Step Behind - 15. Security -
- Starting to Learn Kubernetes a Step Behind - 16. Components -
Last time
In Starting to learn Kubernetes a step behind - 02. Docker For Mac -, we tried running Kubernetes lightly on Mac. In DockerForMac, the Node was only Master, so it felt insufficient to learn Kubernetes. Therefore, we decided to build a home Kubernetes using RaspberryPi.
Reference sites
- Building a Kubernetes cluster with RaspberryPi
- Where I got stuck building home Kubernetes - Niche Edition -
- Persisting data in home Kubernetes
- Kubernetes RaspberryPi wrap looked delicious, so I made it using kubeadm
- Building a home Kubernetes cluster with Raspberry PI and kubeadm
- 3 Days Cooking【Kubernetes RaspberryPi Wrap "CyberAgent Style"】
- 33 Hours Cooking【Kubernetes RaspberryPi Wrap〜Wedding Park Style〜】
Recipe
| Product Name | Quantity | Purpose |
|---|---|---|
| Raspberry Pi 3 Model B | 3 | MasterNode1 WorkerNode2 |
| microSDHC Card 16GB | 3 | Image writing destination for RaspberryPi |
| LAN Cable | 1 | Network connection with RaspberryPi |
| USB Charger | 1 | Power supply for RaspberryPi |
| Micro USB Cable | 4 | Connect RaspberryPi and USB charger |
| for Raspberry Pi Case 4-tier with heat sink | 1 | 4-tier (3:RaspberryPi,1:USB Charger) |
RaspberryPi can connect to WiFi if it's a 3rd generation ModelB, so I decided to connect it to my home WiFi. I use SoftbankAir at home. (However, the network is connected via a LAN cable only for the first time)
Also, my environment is as follows.
iMac (21.5-inch, 2017)
Construction (Physical)
There is enough information in Building home Kubernetes with Raspberry Pi (Physical Edition). I will assemble it referring to this. Here is what I made.
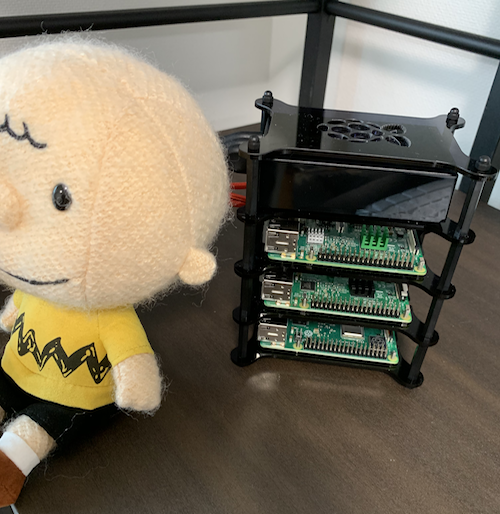
To use WiFi, I got rid of LAN cables and WiFi routers, and it became neat. As long as you can secure a power supply, you can carry it anywhere in the house. ✨
Construction (Logical)
Download Raspbian Stretch Lite in advance.
Follow the steps from 1 to 3 for each RaspberryPi as follows.
1. Initial settings
After connecting the microSD card to the Mac, perform the following.
$ diskutil list
$ sudo diskutil umount /dev/disk3s1
$ sudo dd bs=1m if=2019-04-08-raspbian-stretch-lite.img of=/dev/rdisk3 conv=sync
$ cd /Volumes/boot
$ touch ssh
$ vim cmdline.txt
# 下記を末尾に追記
cgroup_enable=cpuset cgroup_enable=memory cgroup_memory=1
When writing an image, it seems to be faster if you add r (rdisk3).
2. Connect to RaspberryPi
Insert the MicroSD card into the RaspberryPi, turn on the power, and perform the following. Connect the LAN cable directly to your home WiFi. (In my case, SoftBankAir)
Set the hostname to your preferred name. (I set Master:raspi001, Worker:raspi002,raspi003.)
$ slogin pi@raspberrypi.local
# 初回password「raspberry」
pi@raspbeerypi:~ $ sudo passwd pi
pi@raspbeerypi:~ $ sudo apt-get update && sudo apt-get -y upgrade && sudo apt-get install -y vim
pi@raspbeerypi:~ $ sudo vim /etc/hostname
pi@raspbeerypi:~ $ sudo sh -c 'wpa_passphrase <SSID> <PASSWORD> >> /etc/wpa_supplicant/wpa_supplicant.conf'
pi@raspbeerypi:~ $ sudo shutdown -r now
※ From the second time onwards, do ssh-keygen -R raspberrypi.local.
Turn off the power and remove the LAN cable. After turning the power back on and waiting a few minutes, perform the following.
$ slogin pi@raspi001.local
pi@raspi001:~ $
If you can connect, it's successful.
3. Various installations
Perform the magic command.
pi@raspi001:~ $ sudo dphys-swapfile swapoff && sudo dphys-swapfile uninstall && sudo update-rc.d dphys-swapfile remove
Install Docker.
pi@raspi001:~ $ sudo apt-get install apt-transport-https ca-certificates curl software-properties-common -y
pi@raspi001:~ $ curl -fsSL https://download.docker.com/linux/debian/gpg | sudo apt-key add -
pi@raspi001:~ $ echo "deb [arch=armhf] https://download.docker.com/linux/$(. /etc/os-release; echo "$ID") \
     $(lsb_release -cs) stable" | \
    sudo tee /etc/apt/sources.list.d/docker.list
pi@raspi001:~ $ sudo apt-get update -y
pi@raspi001:~ $ sudo apt-get install docker-ce -y
Install Kubernetes.
pi@raspi001:~ $ curl -fsSL https://packages.cloud.google.com/apt/doc/apt-key.gpg|sudo apt-key add -
pi@raspi001:~ $ echo "deb http://apt.kubernetes.io/ kubernetes-xenial main" | sudo tee /etc/apt/sources.list.d/kube.list
pi@raspi001:~ $ sudo apt-get update -y && sudo apt-get install kubelet kubeadm kubectl -y
4. MasterNode settings
Perform the following for the RaspberryPi to be the MasterNode.
pi@raspi001:~ $ sudo kubeadm init --pod-network-cidr=10.244.0.0/16
pi@raspi001:~ $ mkdir -p $HOME/.kube
pi@raspi001:~ $ sudo cp -i /etc/kubernetes/admin.conf $HOME/.kube/config
pi@raspi001:~ $ sudo chown $(id -u):$(id -g) $HOME/.kube/config
Note the output join message and use it when building the WorkerNode.
Follow the instructions here and execute the following.
pi@raspi001:~ $ kubectl apply -f https://raw.githubusercontent.com/coreos/flannel/a70459be0084506e4ec919aa1c114638878db11b/Documentation/kube-flannel.yml
pi@raspi001:~ $ kubectl get pods --all-namespaces
NAMESPACE     NAME                               READY   STATUS              RESTARTS   AGE
kube-system   coredns-fb8b8dccf-lglcr            0/1     ContainerCreating   0          4d16h
kube-system   coredns-fb8b8dccf-snt7d            0/1     ContainerCreating   0          4d16h
...
5. Setting up WorkerNode
Execute the join command output from MasterNode.
pi@raspi002 $ kubeadm join 192.168.3.32:6443 --token X \
    --discovery-token-ca-cert-hash sha256:X
6. Confirmation from MasterNode
Check if the Node has increased.
pi@raspi001:~ $ kubectl get nodes
NAME       STATUS   ROLES    AGE   VERSION
raspi001   Ready    master   65m   v1.14.1
raspi002   Ready    <none>   18m   v1.14.1
raspi002   Ready    <none>   18m   v1.14.1
pi@raspi001:~ $ kubectl label node raspi002 node-role.kubernetes.io/worker=worker
pi@raspi001:~ $ kubectl label node raspi003 node-role.kubernetes.io/worker=worker
pi@raspi001:~ $ kubectl get nodes
NAME       STATUS   ROLES    AGE   VERSION
raspi001   Ready    master   65m   v1.14.1
raspi002   Ready    worker   37m   v1.14.1
raspi003   Ready    worker   37m   v1.14.1
7. Confirmation from the browser
Let's quickly go through the process of deploying → exposing the service → checking the browser.
pi@raspi001:~ $ kubectl run nginx --image=nginx --replicas=1 --port=80
pi@raspi001:~ $ kubectl expose deployment nginx --port 80 --target-port 80 --type NodePort
pi@raspi001:~ $ kubectl get svc nginx
NAME    TYPE       CLUSTER-IP      EXTERNAL-IP   PORT(S)        AGE
nginx   NodePort   10.99.227.194   <none>        80:30783/TCP   17m
Since we have exposed the service, let's access it.
Internal
pi@raspi001:~ $ curl http://10.99.227.194:80
<!DOCTYPE html>
<html>
<head>
<title>Welcome to nginx!</title>
<style>
    body {
        width: 35em;
        margin: 0 auto;
        font-family: Tahoma, Verdana, Arial, sans-serif;
    }
</style>
</head>
<body>
<h1>Welcome to nginx!</h1>
<p>If you see this page, the nginx web server is successfully installed and
working. Further configuration is required.</p>

<p>For online documentation and support please refer to
<a href="http://nginx.org/">nginx.org</a>.<br/>
Commercial support is available at
<a href="http://nginx.com/">nginx.com</a>.</p>

<p><em>Thank you for using nginx.</em></p>
</body>
External
pi@raspi001:~ $ ifconfig
...
wlan0: flags=4163<UP,BROADCAST,RUNNING,MULTICAST>  mtu 1500
        inet 192.168.3.32  netmask 255.255.255.0  broadcast 192.168.3.255
Access http://192.168.3.32:30783
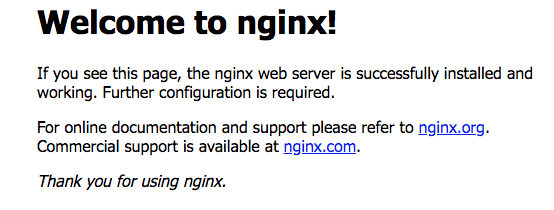
OK!
Cleanup
pi@raspi001:~ $ kubectl delete deployments nginx
deployment.extensions "nginx" deleted
pi@raspi001:~ $ kubectl  delete service nginx
service "nginx" deleted
Completion
We were able to build smoothly. This is because there are many articles by predecessors, we were able to proceed crisply. Now, we will use Kubernetes to the fullest!! 💪💪 The next one is here.

If it was helpful, support me with a ☕!
Share
Related tags
- Cloud Native Days Tokyo 2019 - Participation Report for July 22-23, 2019
- Starting to Learn Kubernetes a Step Behind - 16. Components -
- Starting to Learn Kubernetes a Step Behind - 15. Security -
- Starting to Learn Kubernetes a Step Behind - 14. Scheduling -
- Osaka, Umeda - Participation Report for Kubernetes Meetup Tokyo 19 Osaka Satellite - May 31, 2019
- Starting to Learn Kubernetes a Step Behind - 13. Health Checks and Container Lifecycle -
- Starting to Learn Kubernetes a Step Behind - 12. Resource Limits -
- Starting to Learn Kubernetes a Step Behind - 11. config&storage Part 2 -
- Starting to Learn Kubernetes a Step Behind - 10. config&storage Part 1 -
- Osaka BMXUG Study Meeting -Kubernates Experience & Watson Discovery Introduction- Participation Report on March 27, 2019
- Starting to Learn Kubernetes a Step Behind - 09. discovery&LB Part 2 -
- Starting to Learn Kubernetes a Step Behind - 08. discovery&LB Part 1 -
- Starting to Learn Kubernetes a Step Behind - 07. Workloads Part 3 -
- Starting to Learn Kubernetes a Step Behind - 06. Workloads Part 2 -
- Starting to Learn Kubernetes a Step Behind - 05. workloads Part 1 -
- Starting to Learn Kubernetes a Step Behind - 04. kubectl -
- Starting to Learn Kubernetes a Step Behind - 02. Docker For Mac -
- Starting to Learn Kubernetes a Step Behind - 01. Choosing the Environment -